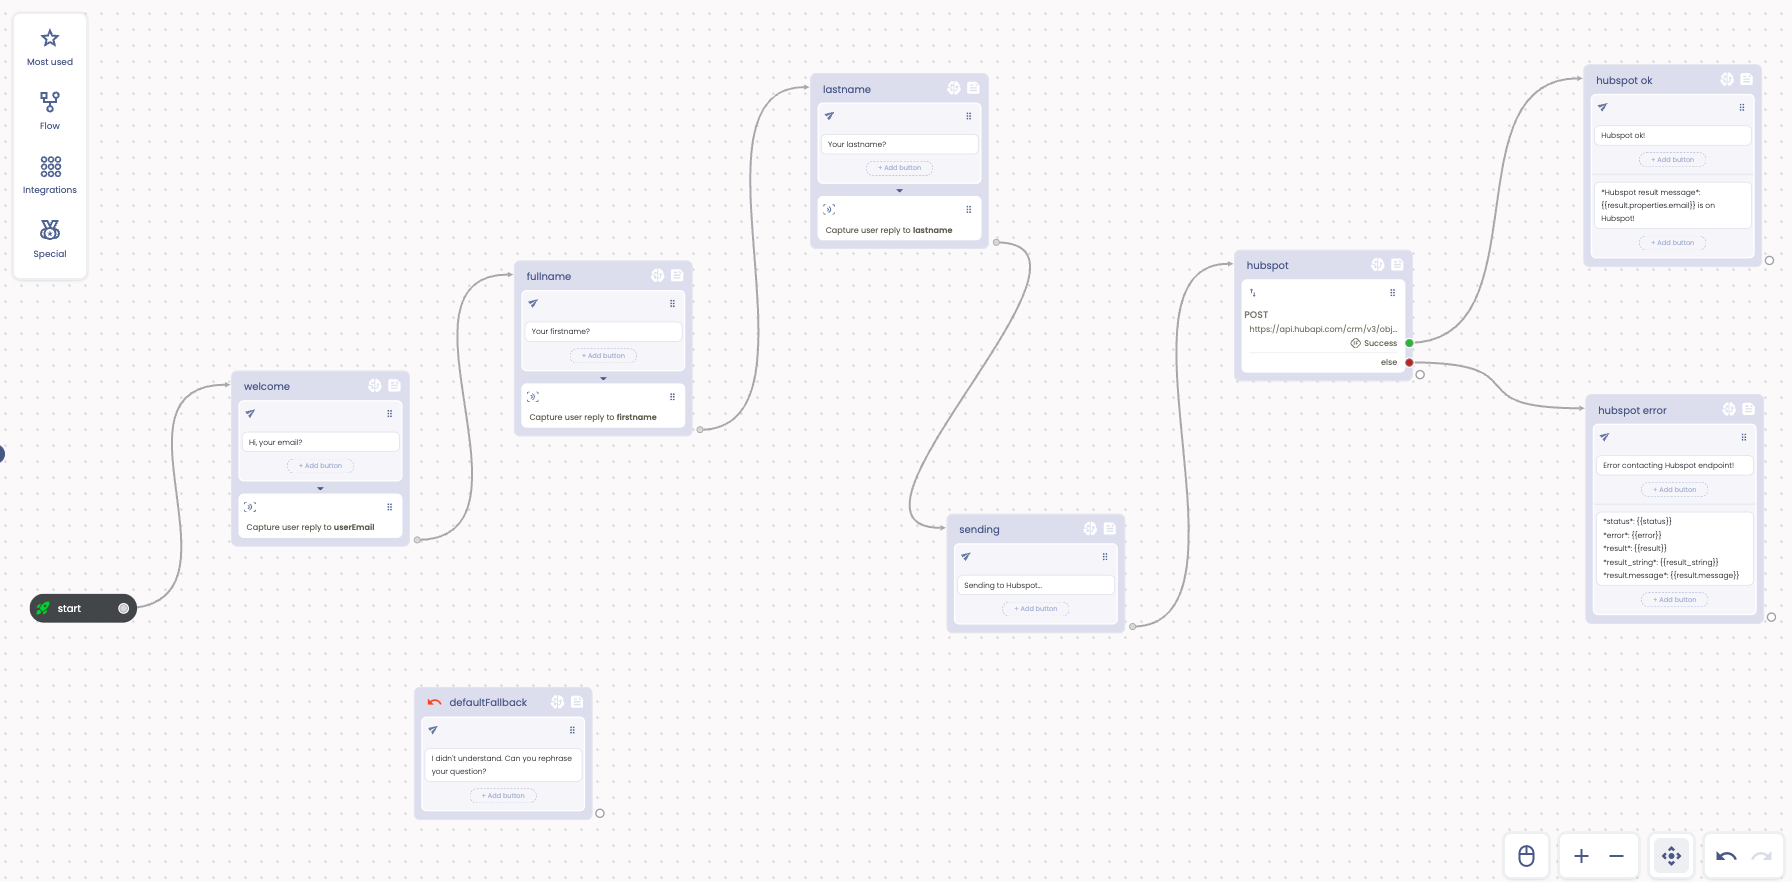
This simple chatbot gets user data through a dyna-form and then creates (or updates) a Contact on [Hubspot](https://www.hubspot.com/).
To use this integration you need a Hubspot Access token. We'll learn how to create one.
We use the "Capture user reply" action to ask the follwing data, creating the corresponding chatbot attributes:
- User first name. Attribute: firstname
- User full name. Attribute: lastname
- User email. Attribute: userEmail
Once the form is configured you can move to the next step, sending contact's data to Hubspot.
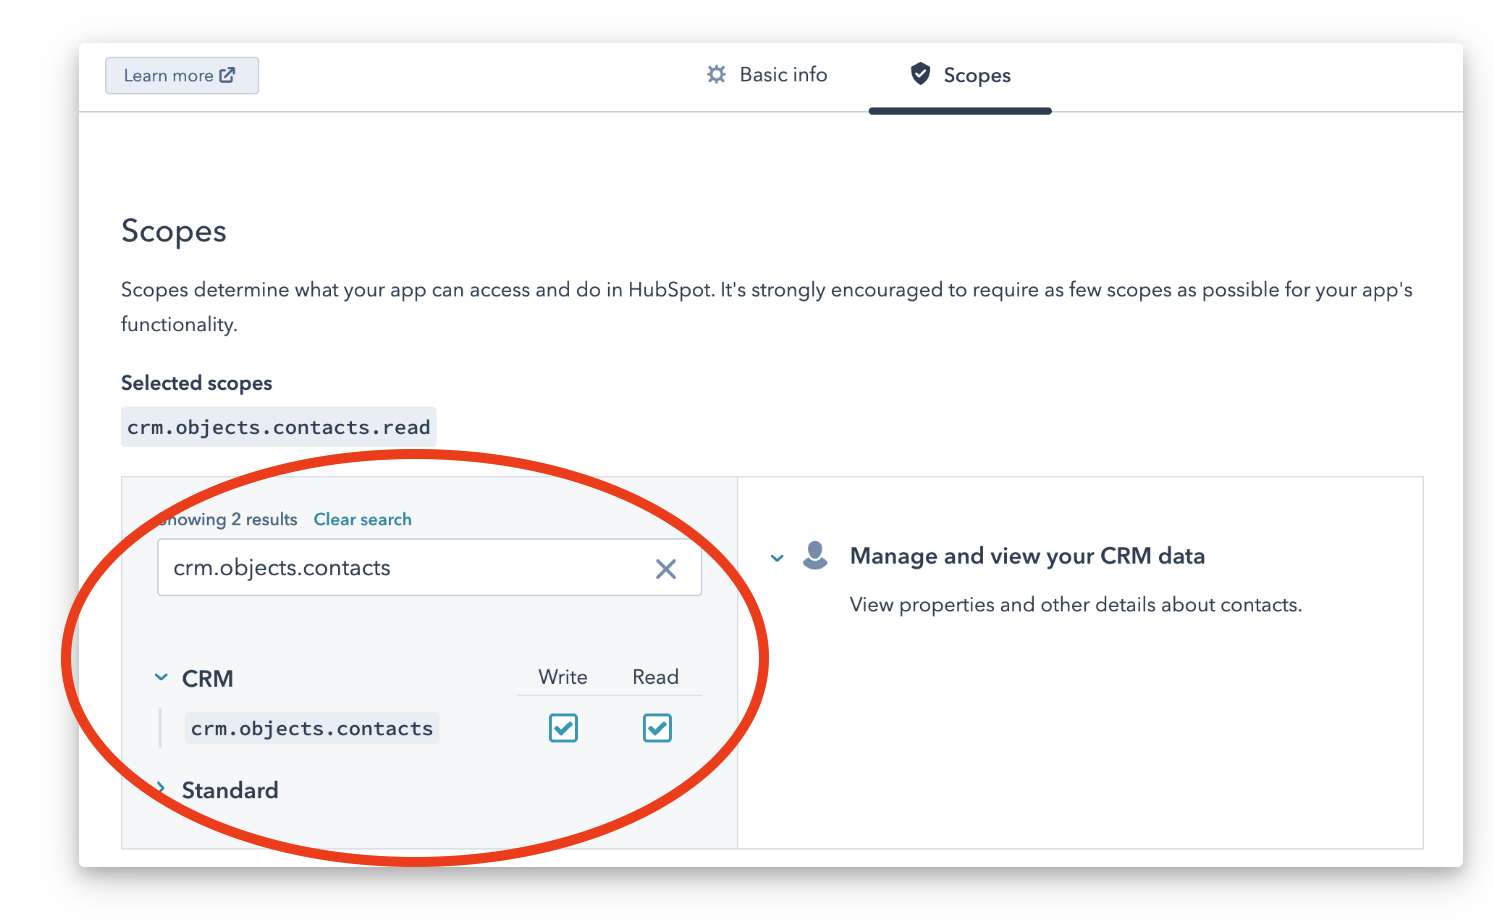
To achieve this goal first create a new Private App on Hubspot. In this way you will get a new Access token to connect to their APIs.
Hubspot Private app
When asked, select the "scope" of your app, taking care of selectiong "contacts" and assigning at least the Write permission (that we use for our chatbot).
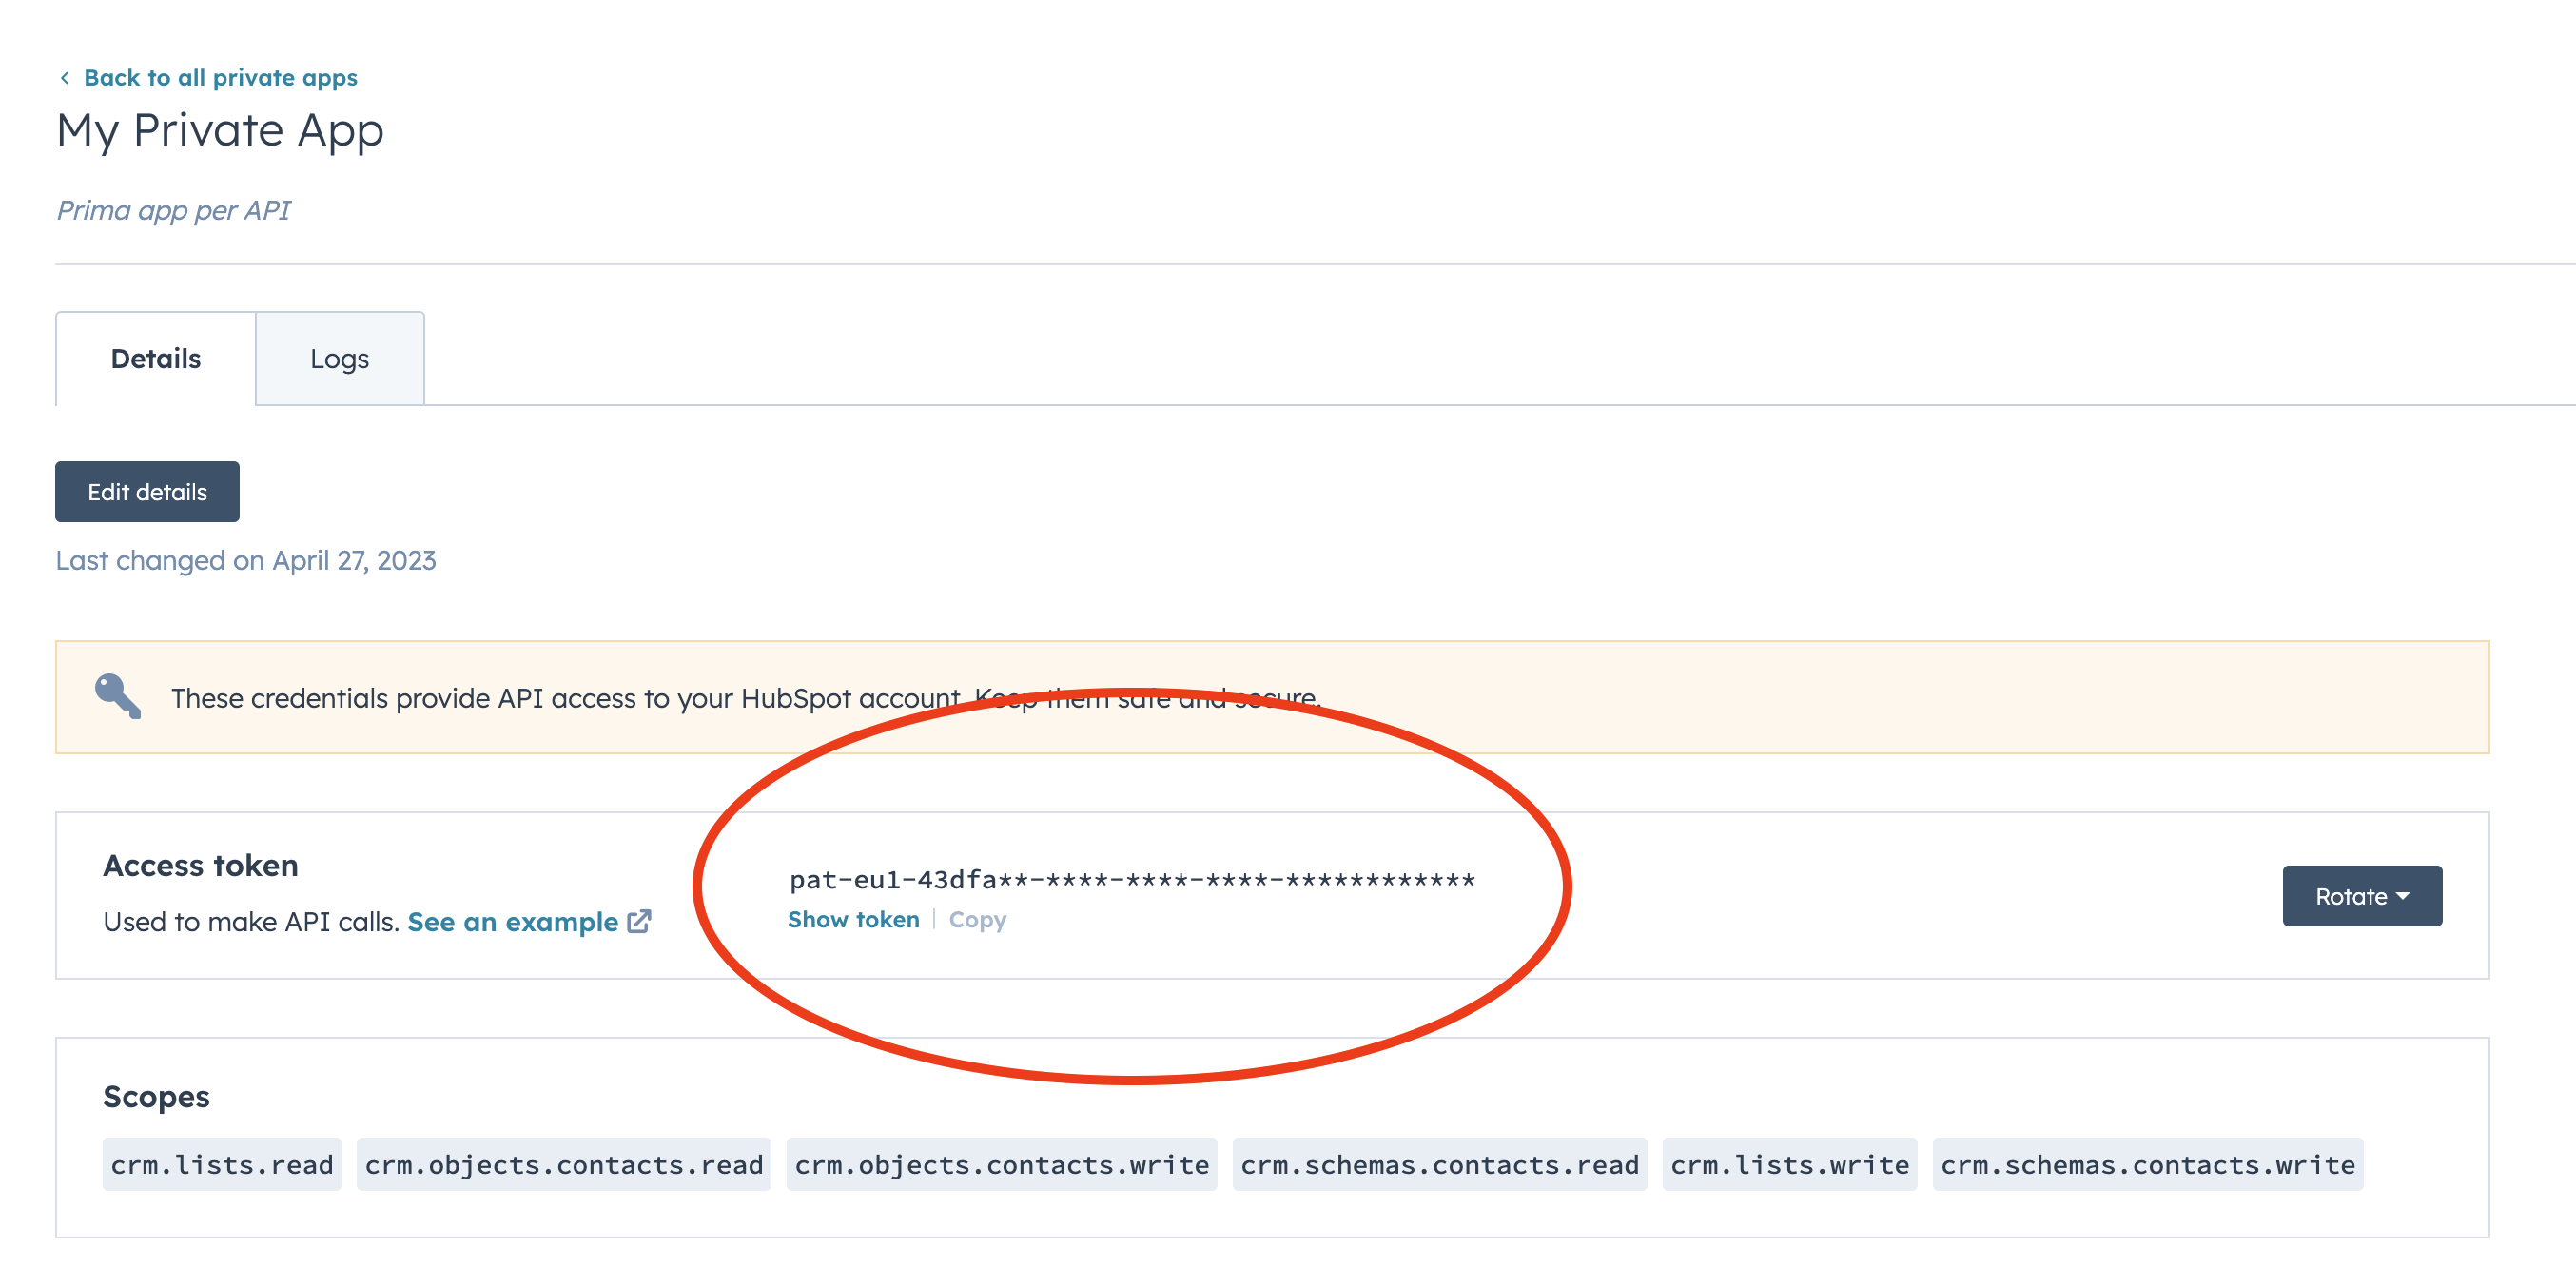
Once created you can go to the App's details page where you can get your Access token. We'll use this later.
Now back to our chatbot.
Add the Hubspot APIKEY to the Globals section of your chatbot.

Now add a WebRequest Action from the side menu.
The WebRequest Action simply executes an HTTP call to the Hubspot "create a contact" REST API. See related https://developers.hubspot.com/docs/api/crm/contacts documentation.
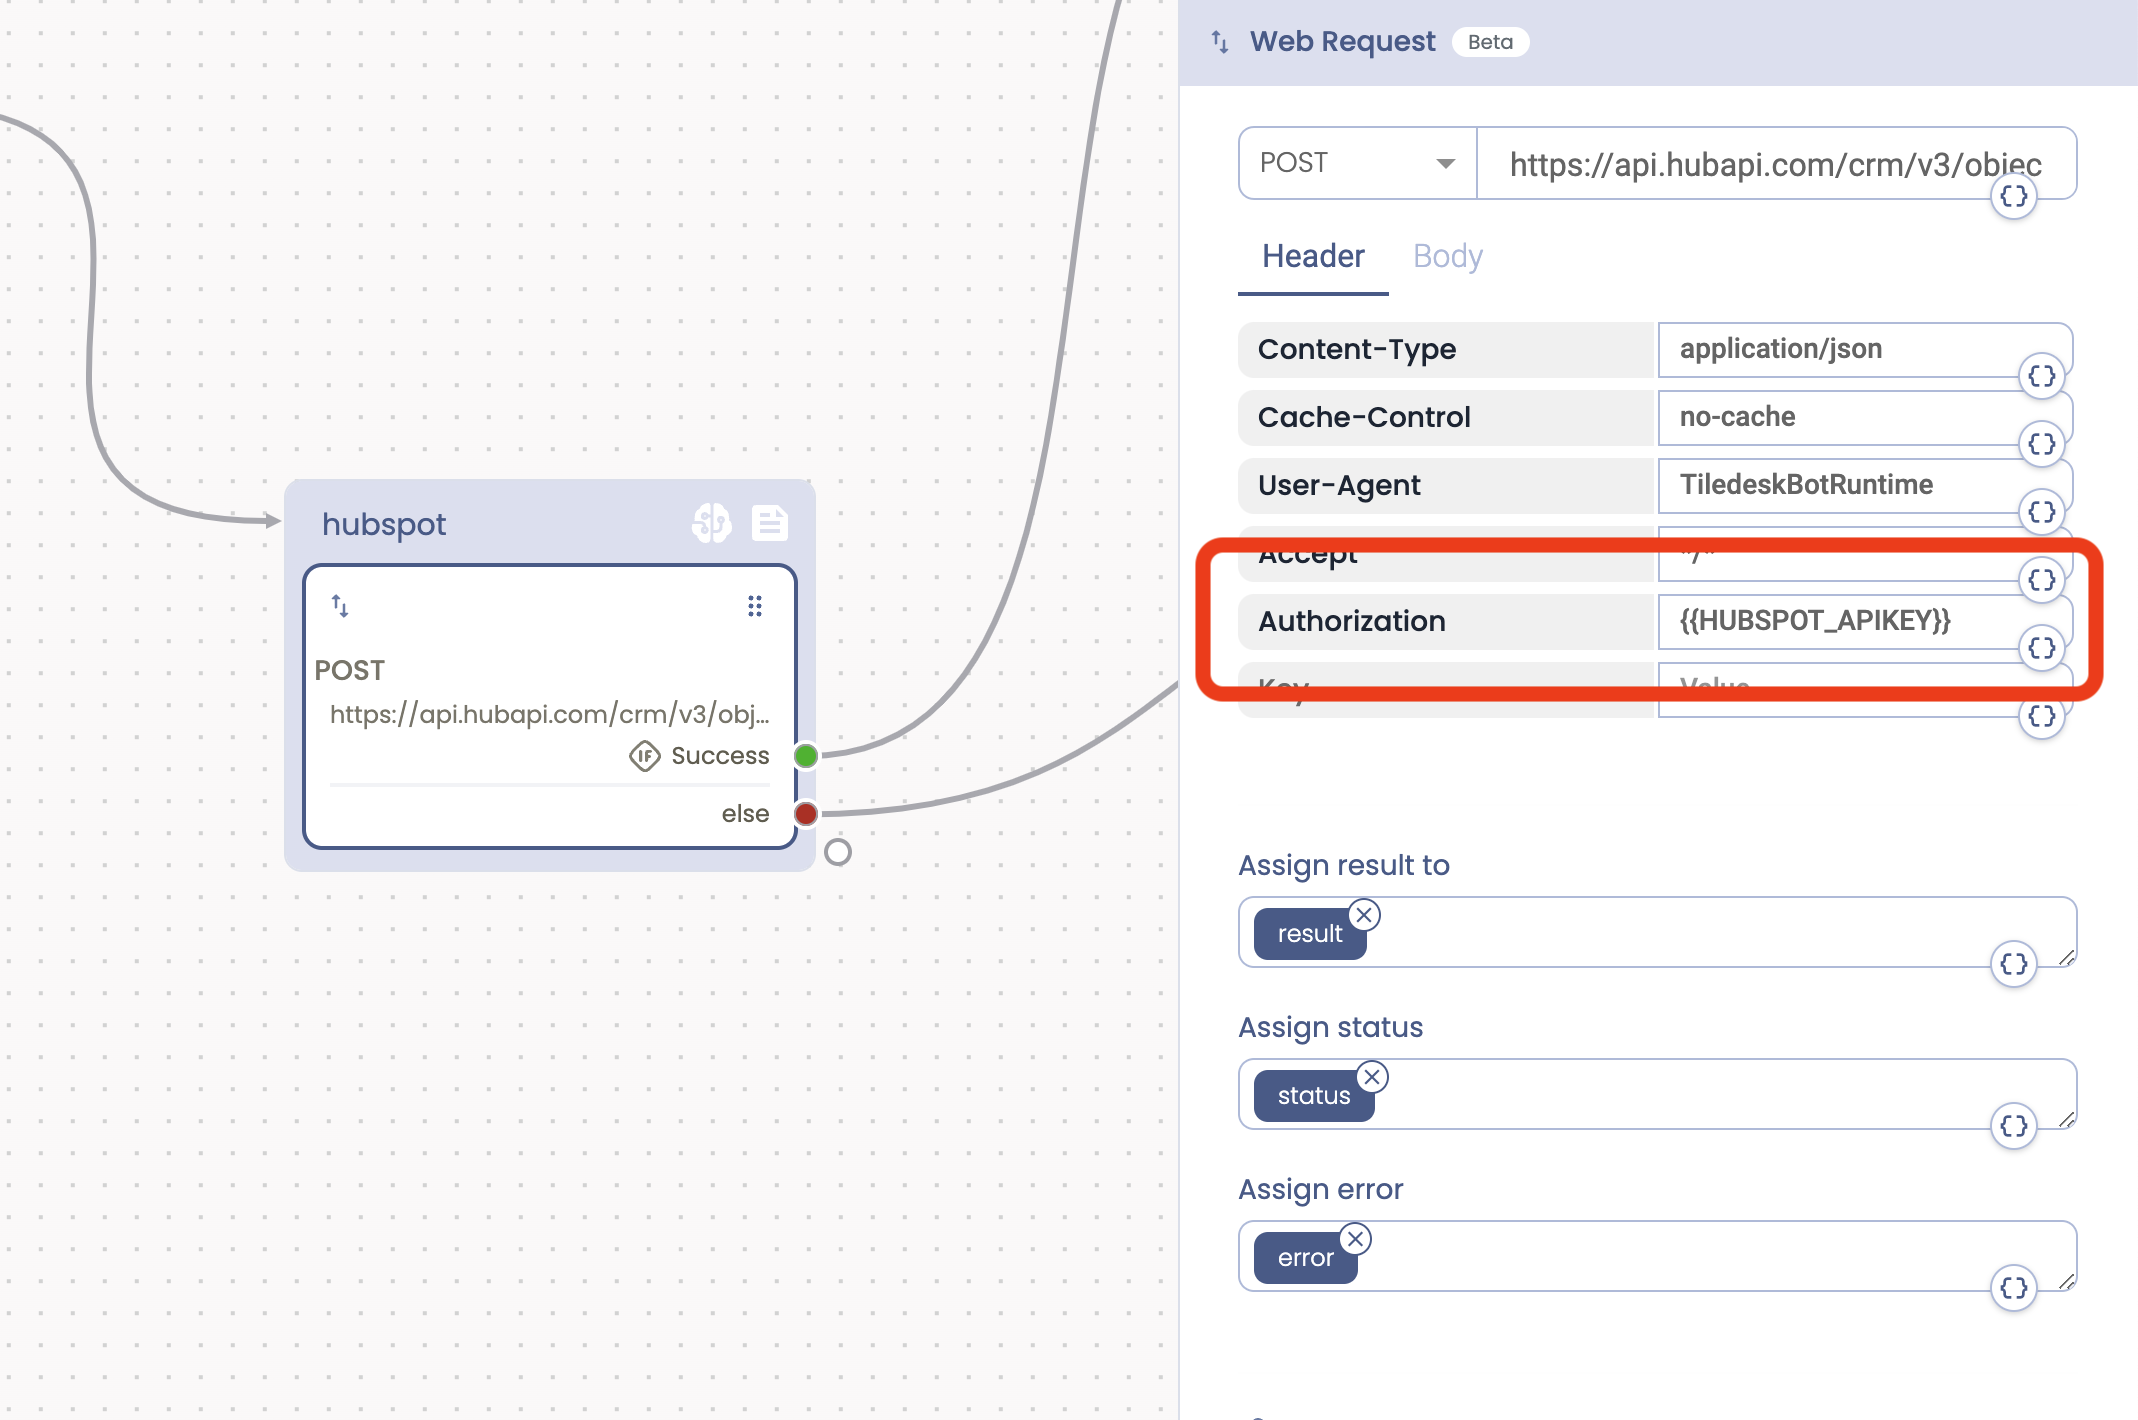
Setup the HTTP url with the documented API endpoint using the POST HTTP method.
Hubspot contact's API endpoint:
https://api.hubapi.com/crm/v3/objects/contacts
Then setup all the HTTP headers fields as in the picture, taking care to add or customize the Authorization header field with your own Access token.
Contact JSON body:
{
    "properties": {
        "email": "{{userEmail}}",
        "firstname": "{{firstname}}",
        "lastname": "{{lastname}}"
    }
}
Well, now press Test it out to see the chatbot in action:
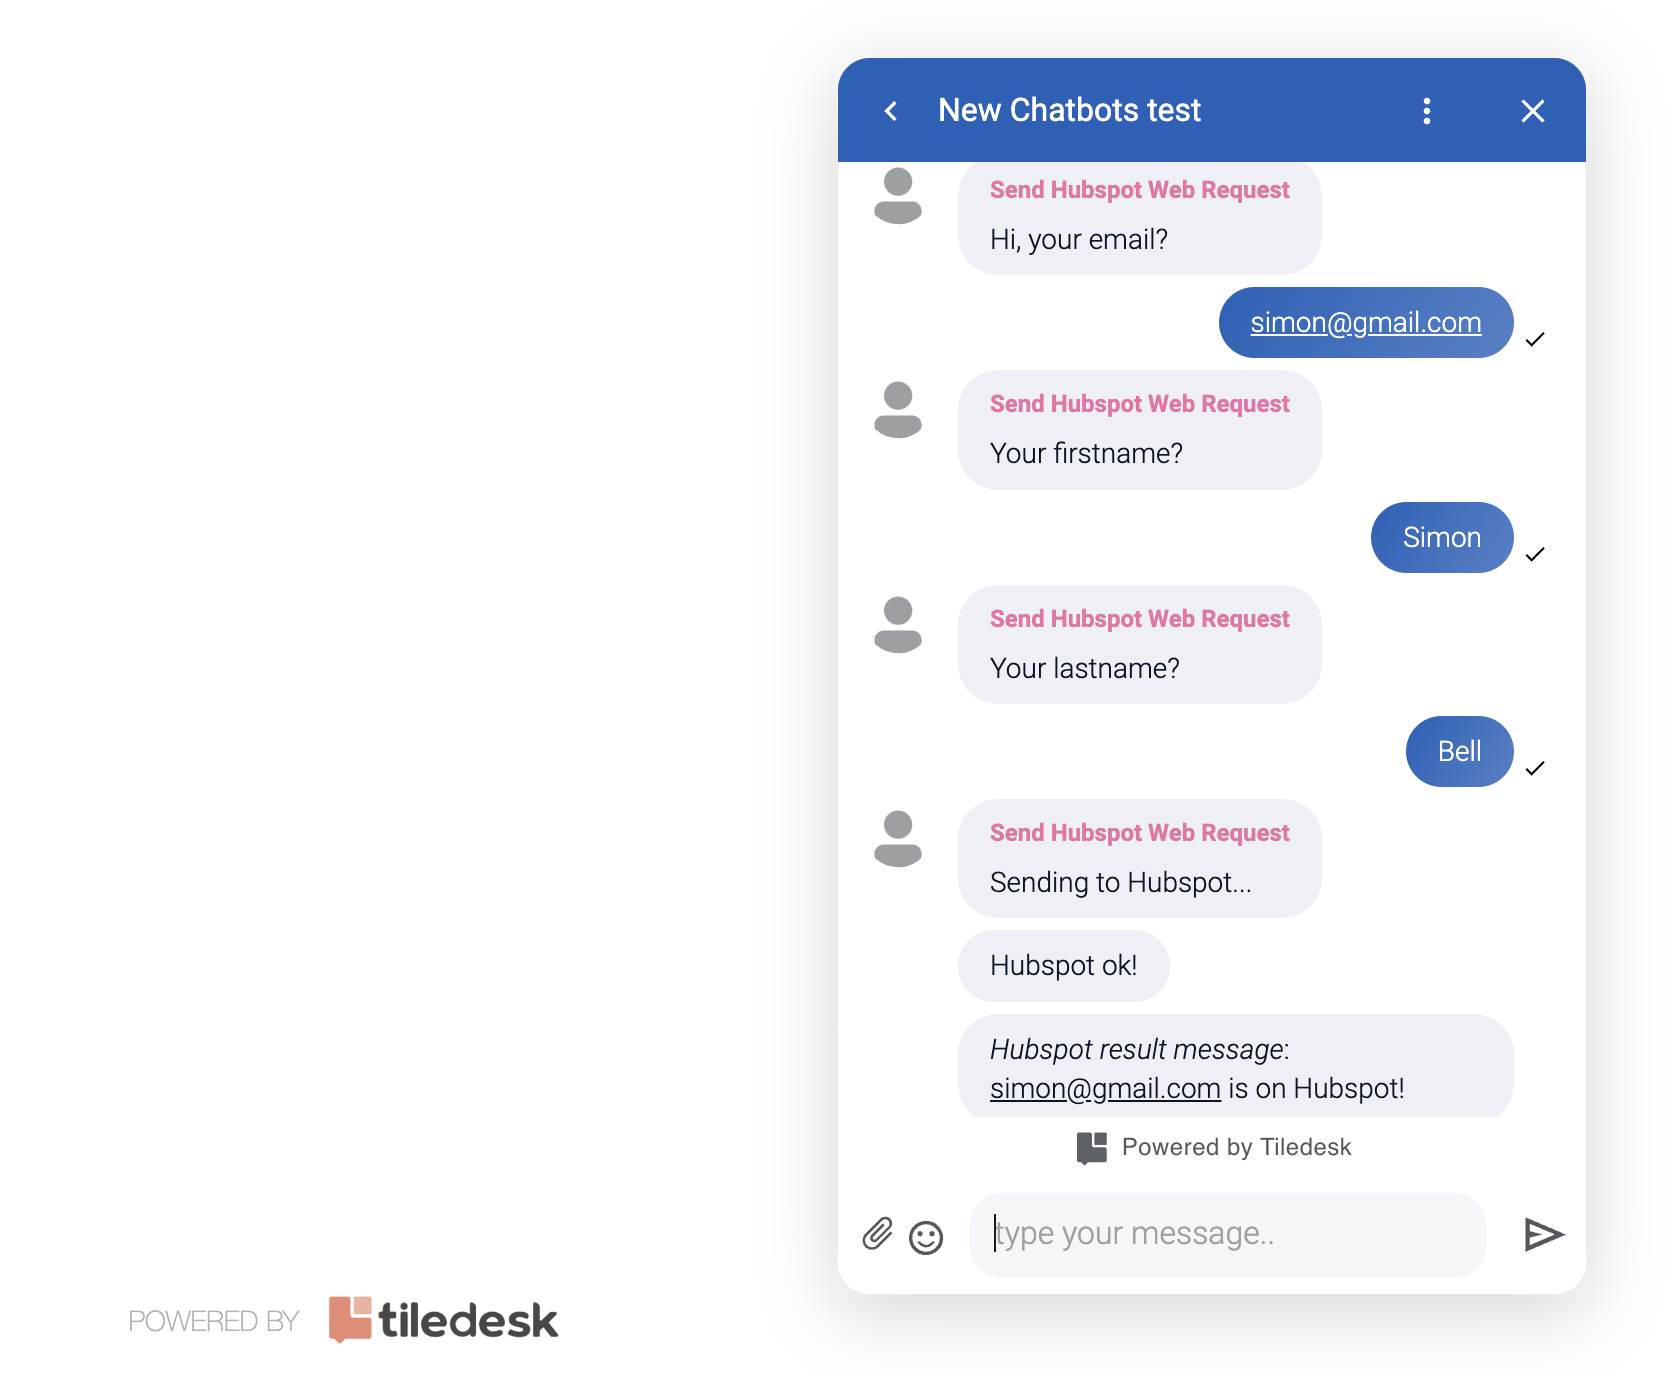
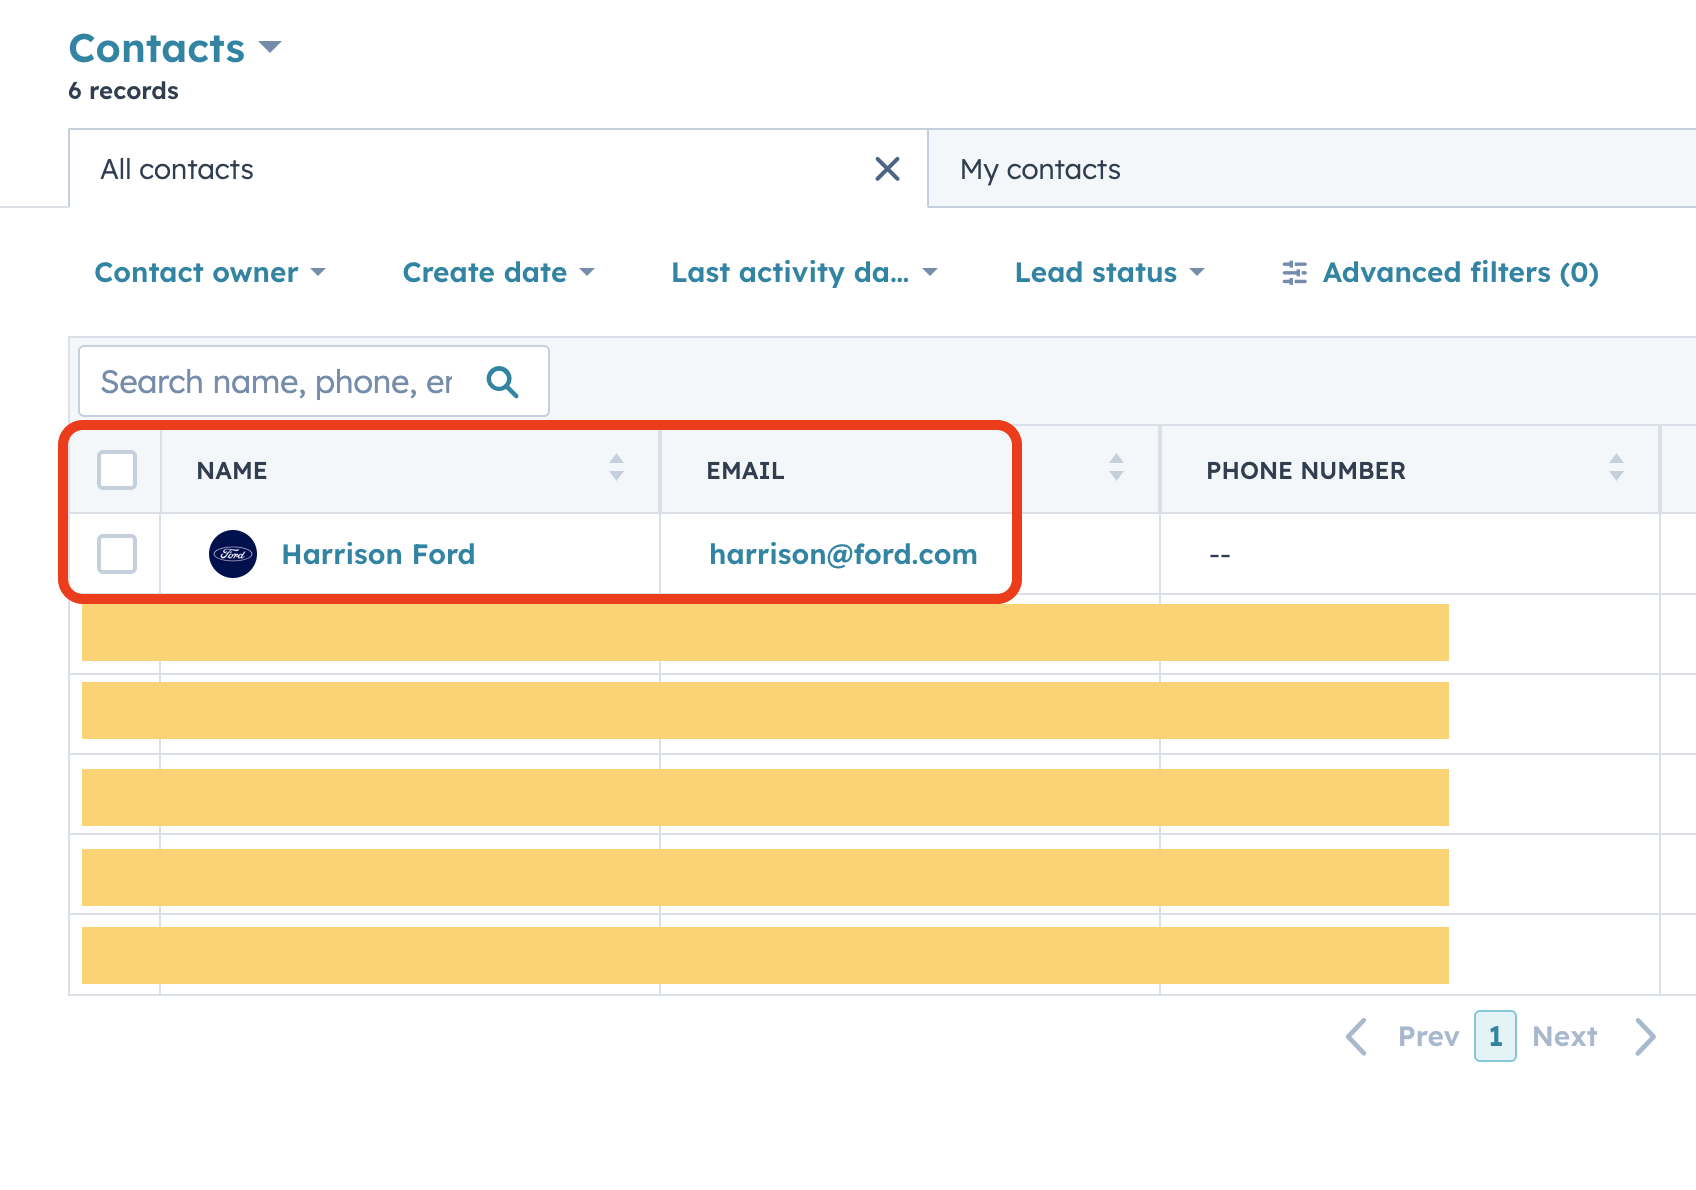
As soon as the conversation ends The WebRequest action sends all the contact data to Hubspot Contacts. You we'll see your updated contact in the Hubspot's Contact center:
Hope you enjoy this simple chatbot 🤖
If you need any help please feel free to contact me at andrea at tiledesk.com 🤓